Slow or Stuck Shutter Repair for Amateurs

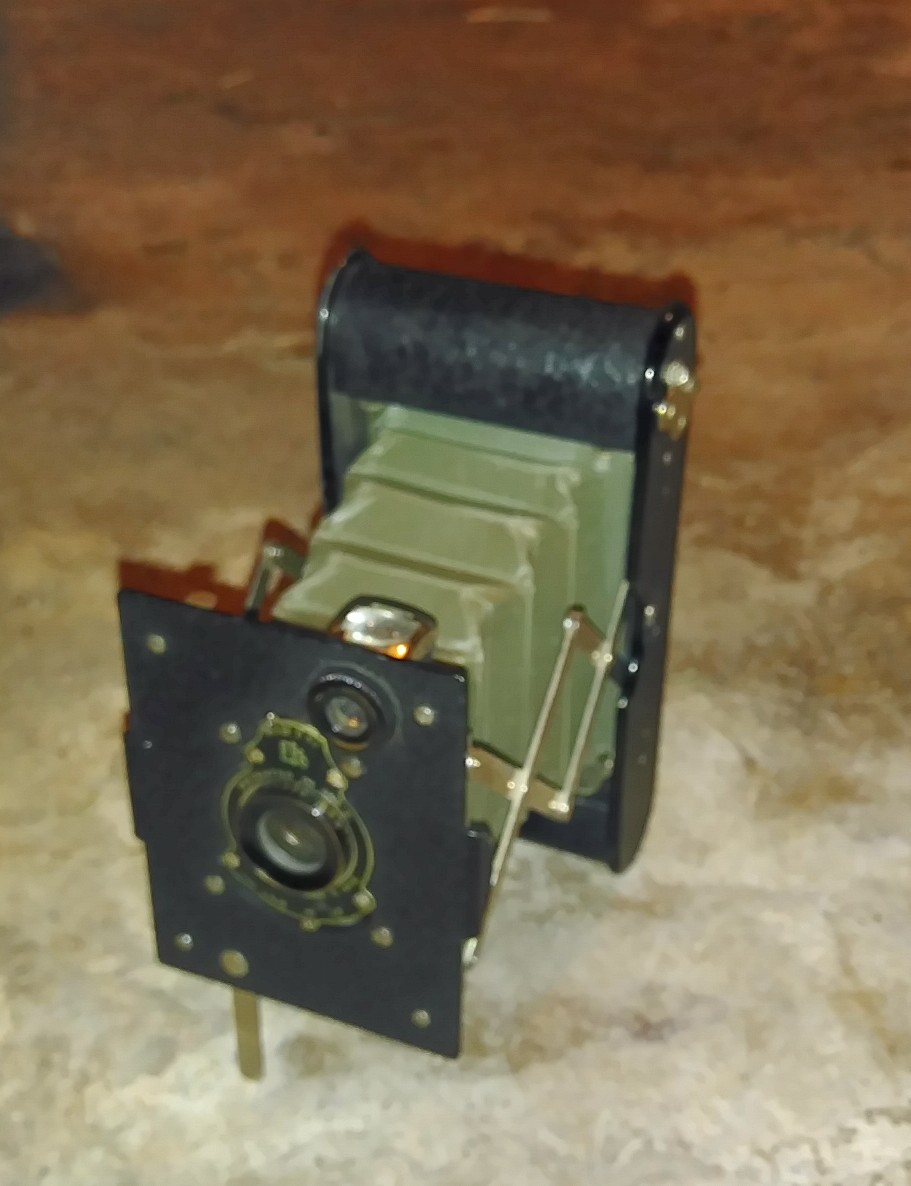
So you got yourself an old camera, old like from the mechanical camera age, not old like from the battery-powered point-and-shoot era. It’s made of metal, not plastic and if the wrap’s intact it looks like leather ‘cause it is. You probably have a lever that cocks the shutter and something that orbits the lens to change the aperture. More than likely you’ll find the camera isn’t operating at full capacity. I put such cameras into one of three groups (always three).

Group One: it basically works. You can focus, set the aperture, cock the fire the shutter, and wind the film on for the next shoot. If you got low standards and can put up with some unpredictable behavior you could go out and have a great time.

Group Two: something doesn’t work. Maybe the focus is so stiff you just always shoot things from 15 feet out. Could be the shutter fires but is like seriously slow, or doesn’t manage to close unless you take your finger off the release even when it’s on 1/50th instead of B. It might have been a whizz-bang tack sharp beauty, but these days it’s got that Lomography aesthetic in spades.

Group Three: it’s a camera shaped paperweight. Someone sold this as a décor item but you were feeling lucky. It may be haunted by the ghost of George Eastman.

A professional could put in the time with their specialist tools and rarefied skills to get any of the above restored. You, like me, do not have those tools or skills and are not willing to leave the trail of bodies in your wake that it’ll take to try and acquire them. Stripped screws, lost springs, gouged metal, and a box of “parts” is all that’s in the cards for any camera with the misfortune to become an attempted aspirational repair. Good news, we’re not doing that. We don’t need any special tools and even if we fail we’re not ending up with a pile of parts that’ll never be a camera again. So what do you need? Patience and heat.

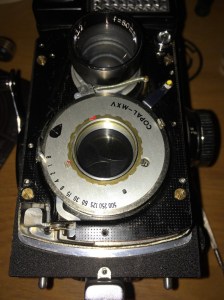
Camera people talk about getting a camera CLA’d. Cleaned, Lubricated, and Adjusted. The important word there is lubricated. Cameras have metal moving parts. Metal on metal is pretty much always lubricated. As with mechanical watches, mechanical cameras tend to use very thin and light lubricant. Thin and light lubricant tends to get thick and tacky after fifty or more years collecting dust. So let’s open it up and spray on the contact cleaner, right? Oh goodness no, that sounds hard. Let’s watch a movie instead.

We Are Now Camera Technicians

If you have a group one camera, put on a movie, or sit down for a couple episodes of some soon-to-be-canceled Netflix series or ultra-niche podcast. Set a speed, cock the shutter and fire. Then do it again, repeatedly, for every speed, again and again until you run out of media to consume or the will to sit still. Slide the aperture ring back and forth again and again. Focus from one extreme to the other. Get a rhythm going and keep at it. Friction turns to heat that slowly but surely leads to a softening of old lubricant and often it’s enough to clean out the cobwebs so to say and you end up with a reliable camera.

If you have a group two or three camera you’ll be doing the mindless zombie cock-and-fire, twist-and-turn, television session as well. Before you give that a try though, you’ll be baking your camera. If you’re camera’s a folder, open it up. Open the film door too. Now apply heat. If you have a sunny window, push the sleepy cat aside (but apologize with some treats and a dime bag of catnip) and stick your camera in that sunbeam. Hopefully for at least an hour. If it’s overcast, if there’s a draft, or a sunny window is otherwise not an option try putting it in a pot on a radiator. Or preheat your oven at its lowest setting for a good twenty minutes, turn it off, and then pop the camera in for a half hour or more like you’re waiting for bread dough to rise. Like with the radiator though, don’t just sit it on the rack, stick it on a baking sheet or something. With the radiator you want something heavy to help diffuse the heat. In the oven it’s more about keeping it stable on a wire rack.

Remove your camera from whatever heat source you used while it’s still warm. It should be warm, not uncomfortable to hold but more than body temperature. Now go through the motions, adjust the focus and aperture, cock and fire the shutter on all the speeds. You’ll probably find things that were frozen in place before move at least a little now. If you made noticeable improvements, repeat the heating cycle and have another go. If you don’t see any change, well, that’s unfortunate. More heat is not the answer.

Violence. Violence is the answer. Gentle violence. Yes really. If the cameras a folder close it all up and give it a few hammers into your open palm. Don’t do it so hard that you’ll hurt your hand and you can be sure it won’t be so hard as to hurt the camera. Now try that stuck shutter again. If you made a little progress, try a heat cycle again. Then try working all the movements again.

There’s a limit to how much good you can do without taking things apart or spending the money on a professional. If something is genuinely mechanically busted you won’t fix it with a touch of heat, but you won’t turn a mostly working camera into a pile of unusable parts either. I can tell you though, that first time you start with a seized up shutter and come away with a working camera it’s a great feeling.

The Best 6×6 Camera

Holga 120S & Welmy-Six

Nobody asked but today I’m going to tell you what the very best 6×6 camera is. To do that I’m going to bring out two cameras. One is world famous, popular, frequently stupid expensive, and is used by a great many working and fine art photographers. The other is commonly available, often a fantastic bargain, and if it’s used by anybody who is anybody—nobodies admitting it. I’m talking of course about the, did I say famous, I meant infamous Holga 120S and the Welmy-Six.

First the one you’ve heard of. The old Holga 120S is a shelter dog if ever there was one. It’s a dog, but a mutt for sure, and if you put in the time it’s a great companion. Just don’t count on waltzing into the AKC show with it unless they already know you there, and your name is a draw.

So forget the metaphor. You’re not going to break into the world of fine art with a Holga, you’re just not. You want to do that you better be some kind of salesman ’cause let me tell you now honey, it doesn’t matter how good a photographer you are. There’s more terrible shooters with big names and well known images on the wall than you’d believe. Wanna get in there too you better know a guy, have a hook, and line up a buyer before you let anyone bother to decide you’re any good or not! Hell, I’m terrible and that’s never kept me from making money at this.

Why the Holga 120S then? Three reasons (ALWAYS 3! THERE’S ONLY EVER 3) it’s light as a feather, dead simple, and nothing special. Which means you won’t think twice about shoving it in your bag or hanging it around your neck. It’s an easy camera to have with you. 33.3% of everything is being there with a camera. Want another truth? Give someone more than one shutter speed, more than one aperture, they’re gonna get some shit frames. A new photographer with a manual SLR without a TTL meter is going to have more impossible to print frames out of 12 than a new photographer with a Holga. A digital workflow can cover up a lot of sins; it’s easier to just shoot better. One aperture, one speed, if you got enough wits to be breathing on your own you’re gonna get 12 frames out of 12 on a Holga. Maybe over a few stops, maybe under, but short of shooting with filters and flash oh-fucking-well you gotta live with it and make it work in the darkroom.

Then there’s the Welmy-Six. It’s nothing special. What it is is a fully mechanical 6×6 folder with just enough features. Cold shoe? Check. Flash sync? Check. On-body shutter release? Horizontal view finder? Vertical view finder? Check check check. Alright, so the lens only opens up to three.5, the shutter only hits 200, 100, 50, 25, 10, 5, two, one & Bulb, and you gotta eyeball your focus. Who cares, it’s a hell of a lot cheaper than an Olympus Chrome 6 or any of the big name 6×6 folders. I got mine from the original home of the overpriced camera, eBay, and it was still under $20 including shipping.

So why buy a Welmy if I already had a $16 Holga? Pockets. The Welmy is a folder so never mind a lens cap and a case, just close it up and it fits in a jacket pocket. Maybe don’t go pocketing it if you live in a bad neighborhood though. It’s heavy and cops will claim it looks like you’re carrying and hassle you. But anyway, yeah, it’s not folding as flat as a Kodak Autographic, but it’s giving me 12 frames of 6×6 instead of 8 frames of 6×9. Oh, and it focuses down to around a foot (the last marked distance on the lens is thee) so table top studio work is very much an option, an option the vertical viewfinder, really does make easy.

The best though? I claimed to know the best 6×6 camera.

The Welmy-Six is basically a Kodak Retina for 120 film, it has that feel. I wrote it above but I’ll do so again, it’s less expensive and easier to get a hold of than any comparable camera in that format. The Lomography crowd isn’t interested because it’s not a Holga or a Diana. The gear heads are after the “serious” brands and they’re all looking for rangefinders and SLRs anyway.

The Holga 120S (forget the other variants) is chunky but weighs nothing. Every time you wind and hit the shutter you’ll end up with something you’ll consider usable; even if the reason you do so is the lowered expectations that automatically activate when you know it was shot with a Holga. There’s so many out there that unless you’re buying new from one of those stores you’ll be able to find one for cheap.

The best then, it’s one of those two. Which, depends on where you are in your film photography journey. One of these cameras speaks with your voice.

Zeiss-Ikon 127 film Box-Tengor

Can we just take a minute to appreciate the best little box camera on Earth?

Way back before the second world war Zeiss-Ikon made a box camera in their Tengor line that took 127 film. It’s tiny. 6x8x5 cm. But it has a portrait and a landscape tripod socket. It’s got a bulb mode switch. It’s got a shutter release socket. And it takes sixteen (basically 35mm size) frames on a roll of 127 film. Later models even have a shutter lock that prevents accidental exposures.

I like my early model a bit more as I don’t have to pull up the viewfinder to activate the shutter. That helps when you just want to shoot from the hip, which is all I do with this camera.

Buy a Kodak Duaflex II

You should absolutely buy a Kodak Duaflex II with a variable focus Kodar lens. Here’s why:

  1. It’s a 6×6 medium format camera.
  2. It’s smaller and lighter than most 6×6’s.
  3. It’s sturdy as anything and dead simple.
  4. The lens is not terrible. With f8, f11, & f16 you can actually get decent coverage for depth of filed and light levels.
  5. There’s double exposure protection, that you can override.
  6. It can use a flash and the common flash unit has a metal reflector.
  7. It’s got a giant waist level finder.
  8. It’s got a tripod socket.
  9. It’s cheap enough you won’t be scared to use it.

Yeah so I broke it down, onto the specifics.

6×6 is a great format cause you can contact print it for wallet size photos and a 6×6 enlarger is way cheaper than other medium formats. Heck, most 35mm enlargers have a negative carrier for 6×6 or will work fine with a hand made cardboard carrier. Sure, it’s 6×6 with 620 rather than 120 but 620 spools are easy to find or you can sand down the ends of a 120 spool.

It’s a pretty compact camera. Smaller than a normal TLR and because of the form a bit more packable than a Holga or Diana. Yeah, it’s bulkier than a folder, like any of the million 6×6 rangefinder or viewfinder cameras, but it’s a fraction of the weight. It’s around the size of a coffee mug.

It’s a thick plastic and metal camera. I bet every one out there has been knocked around and dropped a dozen or more times. Don’t go out of your way to beat it up but in the normal run of things the cameras just don’t break and they are almost too simple to fail and need work. This is a toss in a bag, chuck in the glove box camera.

It’s a Kodak, with a Kodak lens. It’s not an award winner but it works and isn’t trash. Some people call it a toy camera, it’s not a pro camera by any means but every family reunion in the 50’s probably had one of these around. If you get one of the variable focus models it’s got some different apertures too. You have some flexibility there and it won’t ever be too confusing. You can pretty much get some kind of negative every time.

Unlike most other cameras in it’s class, basically box cameras, the variable focus models (and all the models above II) have double exposure prevention. If you don’t wind it, no clicky clicky, unless you specifically press the override. This is a great feature for forgetful people or anyone used to 35mm or any fancier cameras. And it’s not some fidley how to circumvent double exposure protection, it’s a little lever, it was designed that way.

The flash units aren’t hard to find, and unlike later models that used a gun style flash that worked with a variety of Kodak cameras the flash was specifically for the Duaflex. Even with the flash attached it’s still decently compact. Not only that but the reflector is actual metal. Most of the later gun style ones used a plastic reflector that just doesn’t stand up to abuse the way a metal one does.

The waist level finder is a thing of beauty. This is the LCD display of yesteryear. The one on the Duaflex is a lens rather than a ground glass so as long as your lined up it works in low light about as well as in normal light. The simple single-element lens in front of it means it’s bright bright bright. If you want ground glass instead, because of how the cameras made you can replace it with a ground glass easily.

Kodak was always good about putting a tripod socket on their cameras and the Duaflex is no exception. Some people never seem to use a tripod but it’s always better to have a socket than not. With that and the B shutter setting you got night work and indoor photography covered.

This is not a costly camera. You’re looking at $5-15 for this, max. Even on a site like eBay the thing is going cheap. I picked one up with a flash and the nearly impossible to find Kodak No.6A close up (portrait) attachment, and the original manuals for the flash everything, for all of $10. This camera is always available and always in working order.

Fuji Super RX-N X-Ray Film

Holidays are coming and people who have them will make the way back to their ancestral homes. Parents and grandparents and great second what-have-yous-once-removed will be in abundance. Ask these people if they have any old cameras. You’re not looking for 35mm point and shoots, not looking for SLRs, or anything that takes a battery. You want “grand-dads first camera” or “the old Kodak”. Something that folds is good but a hulking box camera works too. They’ll give it to you, just ask.

If you haven’t got that, hit up friends to ask their own on your behalf.

Keep asking till you get a hold of a heavy thing anywhere from the size of a pack of cigarettes to a VHS cassette. On the smaller size you’ll have something taking 127 film, on the larger size something taking 616. Everything here applies to all the sizes in between. Now, they do still make 127 film, and they 120 too. Hell, they make adapters to use 120 where 116 or 616 should go, but we’re being cheap, so it doesn’t matter. This is gonna be cheaper than even the cheapest 35mm film.

So here’s my camera. It’s a Kodak Vest Pocket Autographic and it takes No. A-127 film. I’m going to teach you to shoot cheap as hell x-ray film in it. See, digital x-rays are becoming a thing but most places that take them still use film, so they still make x-ray film and un-like a lot of stuff that’s intended for a professional setting x-ray film is way the hell cheaper than it’s public sector equivalent, cut film. If you can’t find a box of 100 sheets of 5×7 x-ray film online for $20.00 delivered, keep looking. Buy it. I lucked out couple years ago and ordered a box of 100 sheets but the folks in the warehouse messed up the order and sent me a case. The case has 5 boxes of 100 sheets and I’m only halfway through the first box. The rest is in a freezer.

So we got a camera, and some x-ray film. What else are we gonna need? A guillotine cutter, a changing bag (small is fine), a source of red light, and a closet or room you can make dark. Don’t worry you only need that room for a small part. Find a marker and some tape, electrical or other black tape is ideal but failing that you can get by with plain old masking tape and a scrap of tin foil. You’ll also need a developer of your choice HC-110 or Rodinal or Diafine, or Pyro, pretty much any film developer. You can’t go wrong with Diafine or HC-110. And something to do the developing in, trays or a daylight tank that’s big enough (what’s big enough? keep reading), or even just some ziplock bags.


Sacrifice a sheet of your x-film and take it out. Hold it up to the back end of your camera and mark out how big a piece it takes to not-quite-cover the rear of the camera. You want to mark it so that it’s not quite as tall as the cameras narrowest rear dimension and not so long as to hit any curves the camera might have on it’s longest dimension. For a 127 like my Autographic, 2 & 1/4 by 3 & 1/4 is a hair on the small side, but just fine. If you want, make it a bit more like 3 & 1/2 on the long side. Put the rest of the sheet aside for a moment and take off the back of the camera.

If you’re using one of the big folding Brownie’s then you can actually see the rear of the lens and the folded bellows, really the whole area that’ll frame your photo. Lay the sheet you cut down on there and make sure it’s big enough that it won’t fall inside or slide around but small enough the back will still fit over it. Cut the first piece down or use the remnant to make a bigger piece if you need. If you’re using a little 127 Autographic like me, turn the round cover on the back to expose the internals and slide the film inside to make sure it’s going to fit. If you’re camera has a B or T shutter setting you can use that now to see if the focus is accurate.

Take your tape and if it’s black and thick that’s enough, just tape all over the red window on the back of your camera. Tape all around the edges and anything else you think light might leak through. See all of these sorts of camera would normally use paper-backed film so they aren’t terribly light tight to begin with. If your using a thin or normal masking tape you can layer on some aluminium foil to get that light-proof capacity. By now you should know what we’re doing. Take your film template into a windowless closet with your guillotine and chop down some film.

Now go out and shoot. Yup, you’re gonna have to go into your changing bag with the camera everytime you shoot a frame, and that might actually be a good thing. You’ll spend more time considering if the shots worth taking if you gotta burn a couple minutes loading after every frame.

When it comes time to develop you need to pick a side of the film you care about and one you don’t. X-ray film has emulsion on both sides and it’s pretty fragile as far as emulsions go so chances are one is gonna get scratched up. My strategy for this is as follows. The Fuji x-ray film I bought has rounded corners. So when I cut down the 5×7 sheets I keep that rounded corner. Then I adopt the rule, when the rounded corner is in the top right, I’m looking at the emulsion. When I load it emulsion faces the lens, when I develop it (usually in PVC tubes in a daylight tank) the emulsion faces the developer.

The great thing about x-ray film is that it’s all orthochromatic, so you can always develop it under red light if that’s convenient. Try and do at least a few sheets in the developer of your choice to figure out how long to process for. Here’s my recommended jumping off points:

PMK pyro: 12minutes

Diafine: 3 minutes each A & B

HC-110: 6 minutes

When you’re all developed and fixed and washed and dry take a look at your negatives. If one side is really scratched up you might want to bleach off the scratched side of the emulsion. That’s wicked easy. Just tape down your negative on a plain white sheet of paper. Tape all four edges so that the good side of the emulsion is down and sealed off. Then grab a bottle of plain old laundry room bleach and a folded over sheet of paper towel. Lightly soak the towel, pressing it over the open lid of the bottle and doing a quick flip is my preferred method, you want it wet but not dripping, then wipe off the scratched emulsion. When that’s done give the paper a quick rinse under a faucet and then peel everything up so you can hang the now thinner but nicer looking sheets to dry.

If like me your first attempt shows a honking big light leak, go ahead and apply more tape.

A few more notes about shooting x-ray film:

This is strictly a sunny daylight film. You don’t want to shoot indoors and this isn’t going to get you very far if your under deep in shade in the woods. The ASA is going to be in the neighborhood of 25, which is actually a feature not a bug. The cameras we’re dealing with here are from a time when 25 or 50 was just about the fastest film going. Couple that with the age of the springs in your shutter and x-ray film is near perfect for these old cameras. There’s generally two sorts of x-ray film, green-sensitive and blue-sensitive. Blue-sensitive will get you more milage in the open on overcast days, and green-sensitive will get you more milage under cover on sunny days. Plan accordingly. Because it’s blind to red light you can pretty much use any red light you have handy as a safelight, a cell phone showing a full screen solid red image, a red bicycle tail-light, a string of red holiday lights, a night-light bulb with a coat of red paint, just about anything. Because it’s so-so-so-sunlight dependant you don’t need a perfectly black room for your darkroom. If you just can’t get the light to stop creeping in under the door, don’t worry, it’s not going to fog, not bad anyway. Note the sky in the positive above, it’s white. X-ray film is blue sensitive and the sky is blue so get ready to have blinding white skies if you choose to have them in your photos. You can’t knock it down with a red filter, because, you know, orthochromatic film. A yellow filter can help a little with the sky, and a green can help you with skin tones, but it’s generally a better bet to just not include any sky in you shots.

Anyway, my post on Arista Ortho-Litho 3.0 has been pretty popular so I figured why not one on the joys of Fuji Super RX-N X-Ray Film? Hope you liked it.

Copal SV & Copal MXV Shutter Repair

Issues

If the Copal SV and MXV shutters in your camera (seen in Yashica TLR’s, among others) doesn’t fire, fires but is sticky on slow speeds, or has otherwise broken, chances are it’s a fault in the self timer. Thankfully there’s a easy fix; just take the self timer out. Unless you know what your doing, in which case you wouldn’t bother reading this post, it’s not worth the effort to try and fix and given the frequency with which the self timer jams you shouldn’t be using it anyway.

Required Tools

Small flathead screwdriver set, 1 cotton swab, patience, PVA glue (to re-attach the camera wrap).

How To

Step 1

Peel the leatherette off the front focus assembly. Don’t pry against the edge of the frame or you’ll scratch and ding the lightweight metal. Just wedge the tip of a broad thin screwdriver under one edge and once there’s enough worked up to grab onto pull it up carefully with your fingers.

Step 2

Remove the four largest screws. Once those are out you can lift off the front assembly all in one unit. You can leave those screws for later and work with the camera body attached but it’s easier to lose screws if they drop to the table from the extra two inches or so the body adds. Once it’s off put the body aside. (I didn’t do this but I’ve no fear of losing screws).

Step 3

Now remove the little screws that hold the front focus assembly cover, the ones on the outside edge of the unit. Once those are off you may lift off the thing metal trim piece.

Step 4

Now remove the even smaller screws that hold the bay 1 lens covers and aperture and shutter speed knobs. Lift that off to expose the shutter and lens assembly.

Step 5

Carefully twist off and set aside the tacking lens. This is actually only one half of the tacking lens, the rest is on the underside below the shutter blades. The lower (film-side) taking lens elements can be left in place.

Step 6

UNADJUSTEDNONRAW_thumb_2a7
Copal-MXV on Yashica-Mat EM

Give the small silver retaining screw that was hidden under the front element of the taking lens a half screw so that it no longer keeps the scalloped retaining ring locked. Once thats done take and pull off the fuzzy end of your cotton swab so that you have a blunt, paper stick. Push the blunt end into one of the scallops, with a little pressure you should be able to unscrew the retaining ring without scratching or bending anything.

UNADJUSTEDNONRAW_thumb_2a8
Retaining ring removed

Step 7

Pull off the marked speed and aperture ring. Once thats out of the way you can lift off the speed cam. Getting it off is a bit easier if you open the aperture up all the way.

Step 8

UNADJUSTEDNONRAW_thumb_2a9
Removed lever and lock ring

First pull off the spring arm that rests on top of the self timer escapement, its on the right side. Then locate the small black post with a lock ring on it, Place your finger lightly over it and carefully pry it off with a small screwdriver. Finally check to see if your shutter has a lock-screw holding the self timer escapement in place, if it does it will be at the far left of the escapement, on the inside near the lens mount. If you see a screw there, give it a quarter turn to release the self timer.

Step 9

UNADJUSTEDNONRAW_thumb_2b3
Removed self timer casement with lever set to position necessary for removal.

Slowly and carefully remove the self timer escapement from the shutter assembly. It will lift straight up. When it catches on the threaded lens mount cock the self timer lever until it’s toothed gear presents it’s flat side to the lens mount, that will free it up to lift out.

Step 10

Use the lever that projects straight down from the rear of the shutter to cock it and test the shutter a few times. If it all goes well place the speed cam back on and hold it in place while testing the other speeds, they should all fire without lag but the timing accuracy is dependent on the springs strength. If all goes well re-assemble the shutter and reinstall the whole unit.

UNADJUSTEDNONRAW_thumb_2b4
Revealed speed cam, place back after self timer removed.

Lomography Diana + & F+ Lenses Field of View

In a previous post I calculated the f-stops of the Cloudy, Partly, and Sunny, settings for the various Lomography Diana + & F+ lenses. Now I will dig out a trig textbook and do the same for the field of view. It bears mentioning that when I type field of view I should be calling it the angle of view. Angle of view is the same thing in a sense but it’s represented by degrees while field of view is properly described as a specific distance. I should first note that this is based on the horizontal field of view and that I performed the calculation for both the 42x42mm mask and 52x52mm mask. After before I figured it out on paper I stuck three strips of tape over the mask, took the back of the camera and sat it on a tripod in my basement (creatively ’cause the tripod socket is on the camera back). That done I put a pair of lamps at the far end of the basement and moved them apart until each bulb just fit in the frame of the 42×42 mask. Then I measured the three sides of the triangle from the lens to each lamp together with the distance of each lamp from the other. Then some different trig calculations were made, those values are called “practical” in the table below. I was only able to do this for the three lenses I currently have. Here’s what I came up with:

20mm Fish-Eye lens

42×42 = 92.8°     52×52 = 105°

38mm Super-Wide lens

42×42 = 57.9°.    52×52 = 68.8°     practical = 53.8°

55mm Wide lens

42×42 = 41.8°     52×52 = 50.6°

75mm Normal lens

42×42 = 31.3°     52×52 = 38.2°     practical = 33.9°

110mm Soft-Telephoto lens

42×42 = 21.6°     52×52 = 26.6°     practical = 24.4°

What’s interesting is that Lomography doesn’t provide this information anywhere that I’ve found unless you count this where they describe the 38mm Super-Wide as “…yielding a 120° view angle.” Or this where the 20mm Fish-Eye is presented as having “[a] 180-degree image!” Which is interesting, as you can then immediately see that the sample images contradict the claim.

Lomography Diana + & F+ f-Stops

110mm Soft Telephoto Lens:

Sunny: f32

Partly: f22

Cloudy: f16

75mm Normal Lens:

Sunny: f22

Partly: f16

Cloudy: f11

55mm Wide Angle Lens:

Sunny: f16

Partly: f11

Cloudy: f8

38mm Super Wide Angle Lens:

Sunny: f11

Partly: f8

Cloudy: f5.6

20mm Fisheye Lens:

Sunny: f5.6

Partly: f4

Cloudy: f3

Source: Published values for the 75mm lens as they appear in Plastic Cameras Lo-fi Photography in the Digital Age by Chris Gatcum. Using those, the aperture diameters were computed as follows: Sunny 3.4mm, Partly 4.7mm, Cloudy 6.8mm. With that aperture f-stops were calculated with the formula: Lens Focal Length / Aperture Diameter = f-Stop