Abandon Fine Art Photography, Be a Photo Operator!

I’m thinking about photography more than normal lately, an upcoming post should explain why, and when I think about things I have to read about them. It’s a coping mechanism to help keep loud things quiet. Now, I’m reading Photography After Capitalism, and you should too, it’s great. Don’t get me wrong, like everything in the genera parts of it read like randomly generated postmodern nonsense. Fortunately, most of it is just very dynamic and original.

One section early on talks about Francis Hodgson and a distinction he draws between photographers and what he’s termed photo operators. It’s a method of addressing the photograph as art debate. I love it. The thing is though, I think there are only photo operators. Photographers are a popular delusion of the fine art market, everything making photographs is a photo operator and it’s simple and beautiful.

Like, Earthrise, is an amazing photograph. Is it art? Is William Anders a photographer because of it? Terry Richardson was an anointed photographer, now he’s just another Harvey Weinstein with a shorter (for now) list and literally indistinguishable from any amateur pornographer on the web. How about that random lady Vivian Maier? Well, how badly do you want to see some arty people fight? Ask them! Ever see one of those one-in-a-million shots where a bird blocks the number plate on a speed-trap or red-light camera? Is something like that a great photo, or would it be if a person took it?

The answer to all those questions, is simple, it doesn’t matter. All those photos exist because of photo operators.

Acufine Diafine Divided Developer Lifespan

The internet says Diafine lasts forever. Search, it’s out there all over the place. No one talks time though. They just comment things like “It ran until I contaminated the B solution with A”, or “The volume of A got so low I just mixed up another batch”. That’s great, but I don’t want to know that. This isn’t going to be that, this is going to be dates.

My Diafine was mixed up July 2018. In the following several months I ran thirteen rolls of 120 and fifteen rolls of 135 (I know because I make hash marks on a masking-tape label on the bottle). A couple of the rolls of 135 were twenty four exposure, but the rest were all thirty six. Then, in December, some shit went down and the bottles sat on a shelf in a friends basement until, well, today. Solution A was in a white PTFE bottle and solution B was in a plastic coated amber glass bottle. That wasn’t a conscious choice beyond my wanting different bottles so I could tell them apart, and it was what I had. It also helped that solution B could go in a Brown bottle.

Just ran a roll of Arista EDU Ultra 400. Came out fine. With chemistry that was mixed up four years and nine months ago.

I can’t comment on how long it lasts in terms of rolls processed, I’m sure there are folks who have gone way over thirty rolls and I’m a roll short of that even now. I do feel it’s useful to say after almost five years, it’s still working as well as when I mixed it. Let it be said, the working shelf-life if Diafine developer is at least five years.

One tip I’d like to add though. Solution A will decrease in volume faster than solution B. This is because, in general, solution A is hitting a dry film and absorbing into the emulsion. When you pour solution A back into your stock bottle whatever absorbed into the emulsion stays behind. That can be avoided by adding a minute or two of a plain water soak at the front end of your processing. The water doesn’t noticeably affect the action of solution A and it cuts down on how much of solution A is “wasted” just wetting the emulsion.

Jobo Auto-Mat 35

A little bird that is definitely real and can obviously read minds told me that analog is king and people want to develop their own 35 mm film. That’s a noble cause and you even get a prize at the end. The prize is not Nobel. For 35mm home development you need stuff, the stuff you need depends on how you decide to go about it. This list will not include all the outliers, it’s going to be too long anyway. Let’s assume you have your camera, your exposed film, and your chemistry.

Option One

  • Changing bag
  • Daylight developing tank

Option Two

  • Auto-loading daylight developing tank

Option One comes with a whole suite of other choices. Metal or plastic tanks & reels being the main one. Metal tanks and reels have some solid things in their favor. They use less chemistry, in the same line, they’re smaller. For agitation, you gotta shake. They can also be kind of a pain ‘cause you need specific reels for each film format, and loading those reels is a bit of a learning curve. Oh, and they’ll last forever and can be cleaned in a dishwasher and dried in an oven. If you go plastic you get to choose what brand is the prettiest. Holy crap there’s a lot of brands. Some you can shake some you can’t and you have to use an agitator rod. Some can be sealed up and sat on a motor driven rolling base instead, which you can do with a metal tank if you try hard enough but that’s just asking for leaks. Plastic tanks pretty much all use more chemistry, but the reels generally adjust to whatever size film you shoot. It’s nice having a reel that’ll take 110, 127, 35, or 120. Versatility like that means they’re pretty big, so I hope you got a darkroom or a big ass changing bag.

Option Two has choices too. Well, a choice, have you got $200 or have you got $30? That can also be written as do you want to buy an Ars-Imago LAB-BOX, or search the second hand market for a vintage Jobo Auto-Mat 35. I know what you’re thinking, we all do, especially the birds. “Jobo isn’t that expensive as hell?” Not the one we’re after.

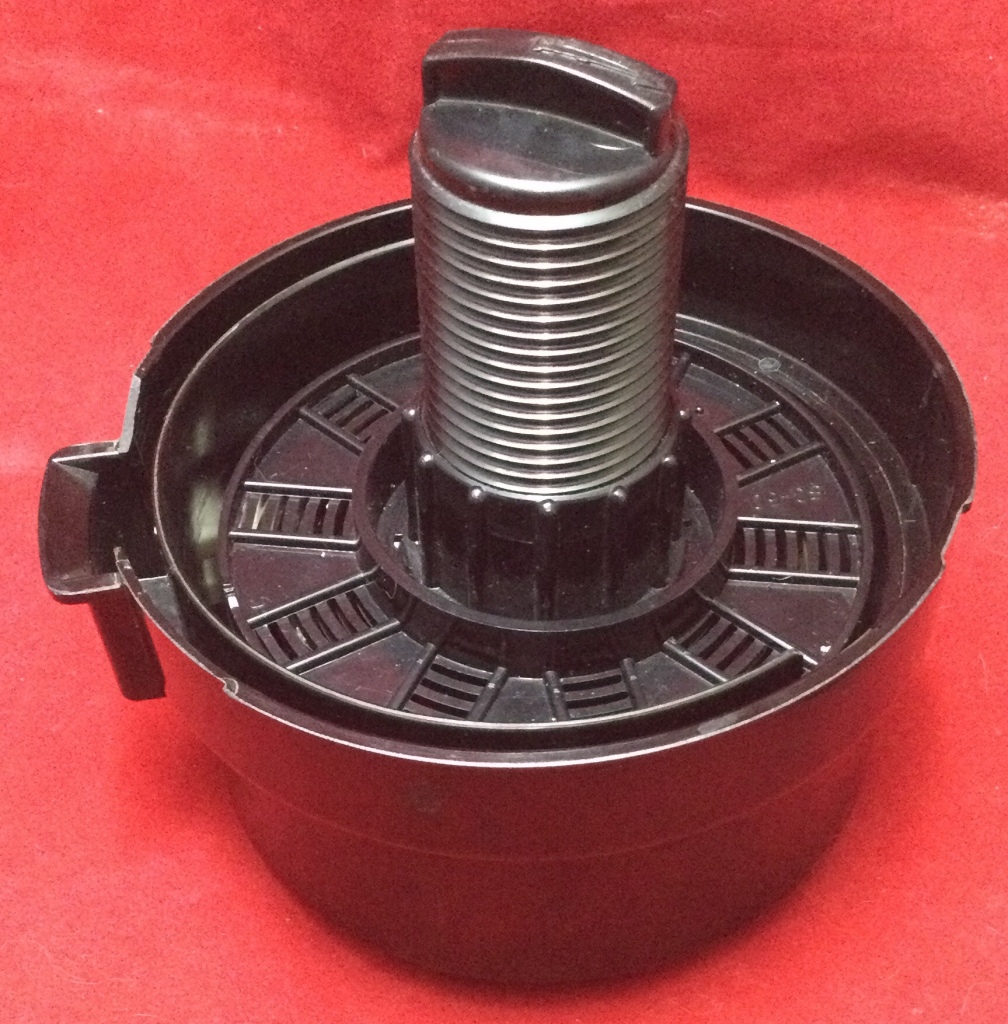
The Jobo Auto-Mat 35, circa old as heck.

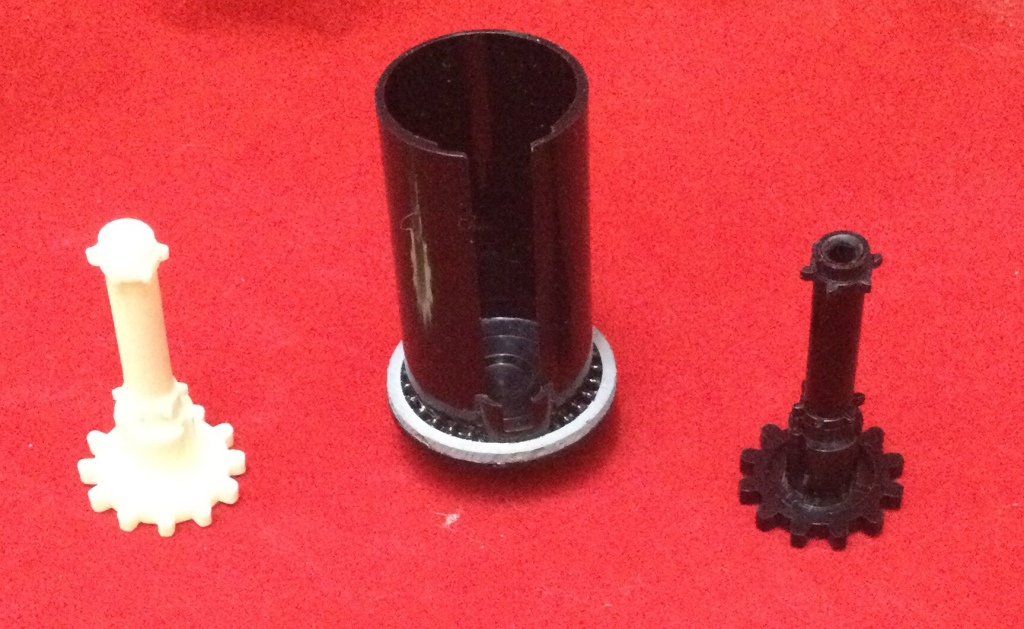
The problem with the above is, how do you use it? Maybe you luck out and get a crumbling pamphlet when you buy yours, good luck with that. I’m told there’s some guy out there selling a poorly scanned pdf for about what you’ll pay for the tank. Maybe I’ll buy that pdf if I ever need to know the difference between the white and black sprocket. So, here we go, instructions on how to use a vintage Jobo Auto-Mat 35. First, let’s make sure you got all the parts.

This tank doesn’t require a changing bag because the exposed film cartridge is loaded, everything is put together, and then it’s developed. There’s other vintage tanks that do the same thing, a bunch of Soviet brands, Kodak, Jobo, Yankee, and others are all out there. They all work basically the same, with the main difference being that for some the film cartridge comes out before the chemistry goes in and with others the film cartridge comes out at the end along with the processed film. The Jobo Auto-Mat 35 is one that soaks the film cartridge in chemistry. That pretty much means you’re going to either use all-plastic reloadable cartridges if you bulk load, or disposable cartridges. Just something to keep in mind.

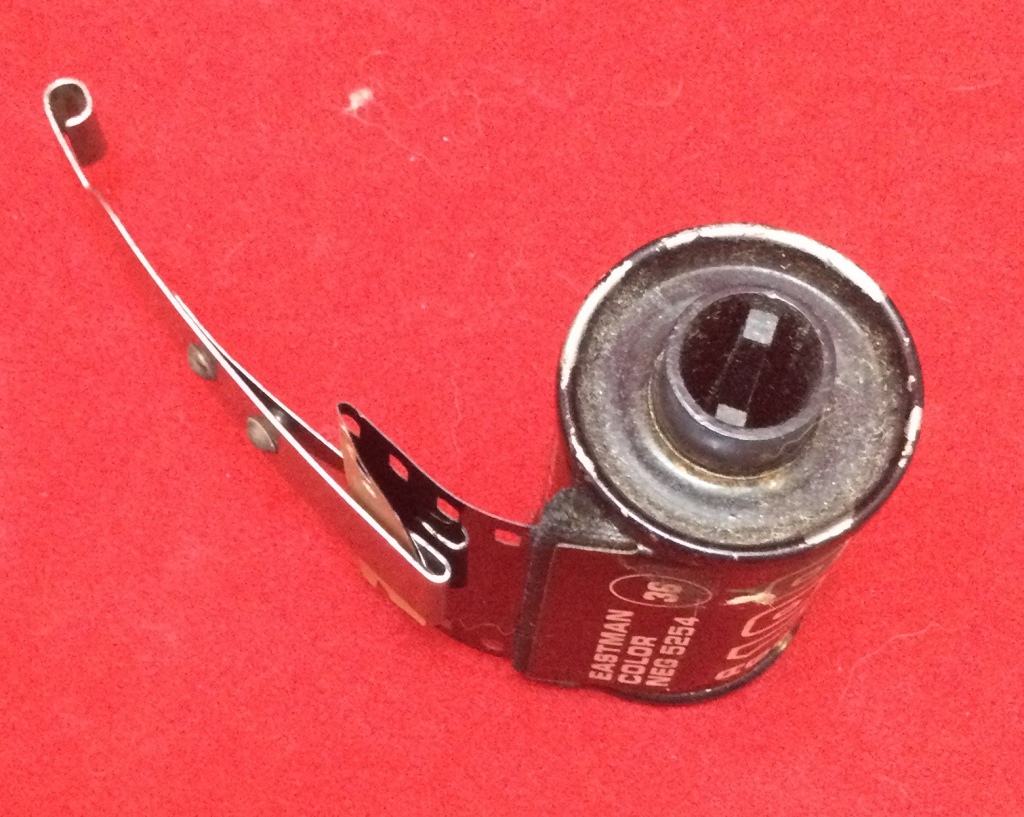
Step One: one is cutting your film leader. Trim the leader to a right angle, then clip the corners. You can actually cut them a little deeper than picture, in fact it works a bit easier if you do.

Trim it straight across and then clip the corners.

Step Two: fold the trimmed leader back about a quarter inch. Fold it away from the cartridge so that the unexposed edge is touching itself.

Fold it back a quarter inch.

Step Three: take the metal film clip off the bottom reel, it should be easy to remove. Slip the film into the film clip with them both curling in the same way, so that if you traced them they’d form an arc, not a wave. Tuck the folded over edge of the film into the folded over tab of the film clip. The photo at the left shows the orientation of cartridge and clip and the photo at the right shows how the film locks into the clip.

Step Four: slide the film cartridge into the cartridge sleeve. The protruding side of the cartridge spool should be on the open side of the cartridge sleeve.

Step Five: drop the loaded cartridge sleeve into the bottom film reel. The sprocket should be installed and you should take care to line everything up. Note that at this point you don’t want the film to be sticking out of the cartridge or cartridge sleeve really at all, it’ll just make lining things up harder later on.

Step Six: with the reel top and cutting tube threaded together, align the dots on the bottom and top reels. There are cut outs that fit together in both, drop the film clip onto the post on the slider on the bottom reel when you do. Note, the cutting sleeve must be threaded to the top reel, it only isn’t in the first photo so I could get a better shot.

Step Seven: this can really be part of the prior step, in fact it works better if you do it all at once but it’s twitchy as all-get-out. In the top film reel there’s a bump the recessed top of he sprocket fits into. In order to fit the sprocket to it, you need to slide the metal tab on the bottom reel that holds the sprocket it place to the side so you can pull it out just a hair. The hard part is getting the sprockets to align with the film sprocket holes. There’s recesses in the reels that help with it but the first time you try you’ll probably mangle the film a little, it’s fine, they’ll fall into place after a little wiggle.

Step Eight: drop the assembled reel into the tank bottom. Give it a slight twist until you feel it locked in.

If it’s locked in place, it’ll be level.

Step Nine: place the tank lid on. The arrow on the lid will line up with the chemistry pour spout, then give the lid a twist to lock it on.

Step Ten: turn the handle on the film cutting tube counter-clockwise to wind the film onto the reel. As the film winds on you’ll hear a double-click on each full revolution. A 36 exposure roll will be fully wound after 14 double-clicks. A 24 exposure roll will be fully wound after 12 double-clicks. A 12 exposure roll will be fully wound after 6 double-clicks.

Step Eleven: grab the bit of the top reel that sticks out of the lid with one hand and turn the cutting tube clockwise. It’ll screw down into the tank. You will very likely not feel it hit or cut through the film and that’s fine. Just screw it down all the way, you atrocious screw-up.

Ready to go!

Now, pour in your chemistry and process your film.

Zeiss-Ikon 127 film Box-Tengor

Can we just take a minute to appreciate the best little box camera on Earth?

Way back before the second world war Zeiss-Ikon made a box camera in their Tengor line that took 127 film. It’s tiny. 6x8x5 cm. But it has a portrait and a landscape tripod socket. It’s got a bulb mode switch. It’s got a shutter release socket. And it takes sixteen (basically 35mm size) frames on a roll of 127 film. Later models even have a shutter lock that prevents accidental exposures.

I like my early model a bit more as I don’t have to pull up the viewfinder to activate the shutter. That helps when you just want to shoot from the hip, which is all I do with this camera.

Buy a Kodak Duaflex II

You should absolutely buy a Kodak Duaflex II with a variable focus Kodar lens. Here’s why:

  1. It’s a 6×6 medium format camera.
  2. It’s smaller and lighter than most 6×6’s.
  3. It’s sturdy as anything and dead simple.
  4. The lens is not terrible. With f8, f11, & f16 you can actually get decent coverage for depth of filed and light levels.
  5. There’s double exposure protection, that you can override.
  6. It can use a flash and the common flash unit has a metal reflector.
  7. It’s got a giant waist level finder.
  8. It’s got a tripod socket.
  9. It’s cheap enough you won’t be scared to use it.

Yeah so I broke it down, onto the specifics.

6×6 is a great format cause you can contact print it for wallet size photos and a 6×6 enlarger is way cheaper than other medium formats. Heck, most 35mm enlargers have a negative carrier for 6×6 or will work fine with a hand made cardboard carrier. Sure, it’s 6×6 with 620 rather than 120 but 620 spools are easy to find or you can sand down the ends of a 120 spool.

It’s a pretty compact camera. Smaller than a normal TLR and because of the form a bit more packable than a Holga or Diana. Yeah, it’s bulkier than a folder, like any of the million 6×6 rangefinder or viewfinder cameras, but it’s a fraction of the weight. It’s around the size of a coffee mug.

It’s a thick plastic and metal camera. I bet every one out there has been knocked around and dropped a dozen or more times. Don’t go out of your way to beat it up but in the normal run of things the cameras just don’t break and they are almost too simple to fail and need work. This is a toss in a bag, chuck in the glove box camera.

It’s a Kodak, with a Kodak lens. It’s not an award winner but it works and isn’t trash. Some people call it a toy camera, it’s not a pro camera by any means but every family reunion in the 50’s probably had one of these around. If you get one of the variable focus models it’s got some different apertures too. You have some flexibility there and it won’t ever be too confusing. You can pretty much get some kind of negative every time.

Unlike most other cameras in it’s class, basically box cameras, the variable focus models (and all the models above II) have double exposure prevention. If you don’t wind it, no clicky clicky, unless you specifically press the override. This is a great feature for forgetful people or anyone used to 35mm or any fancier cameras. And it’s not some fidley how to circumvent double exposure protection, it’s a little lever, it was designed that way.

The flash units aren’t hard to find, and unlike later models that used a gun style flash that worked with a variety of Kodak cameras the flash was specifically for the Duaflex. Even with the flash attached it’s still decently compact. Not only that but the reflector is actual metal. Most of the later gun style ones used a plastic reflector that just doesn’t stand up to abuse the way a metal one does.

The waist level finder is a thing of beauty. This is the LCD display of yesteryear. The one on the Duaflex is a lens rather than a ground glass so as long as your lined up it works in low light about as well as in normal light. The simple single-element lens in front of it means it’s bright bright bright. If you want ground glass instead, because of how the cameras made you can replace it with a ground glass easily.

Kodak was always good about putting a tripod socket on their cameras and the Duaflex is no exception. Some people never seem to use a tripod but it’s always better to have a socket than not. With that and the B shutter setting you got night work and indoor photography covered.

This is not a costly camera. You’re looking at $5-15 for this, max. Even on a site like eBay the thing is going cheap. I picked one up with a flash and the nearly impossible to find Kodak No.6A close up (portrait) attachment, and the original manuals for the flash everything, for all of $10. This camera is always available and always in working order.

Fuji Super RX-N X-Ray Film

Holidays are coming and people who have them will make the way back to their ancestral homes. Parents and grandparents and great second what-have-yous-once-removed will be in abundance. Ask these people if they have any old cameras. You’re not looking for 35mm point and shoots, not looking for SLRs, or anything that takes a battery. You want “grand-dads first camera” or “the old Kodak”. Something that folds is good but a hulking box camera works too. They’ll give it to you, just ask.

If you haven’t got that, hit up friends to ask their own on your behalf.

Keep asking till you get a hold of a heavy thing anywhere from the size of a pack of cigarettes to a VHS cassette. On the smaller size you’ll have something taking 127 film, on the larger size something taking 616. Everything here applies to all the sizes in between. Now, they do still make 127 film, and they 120 too. Hell, they make adapters to use 120 where 116 or 616 should go, but we’re being cheap, so it doesn’t matter. This is gonna be cheaper than even the cheapest 35mm film.

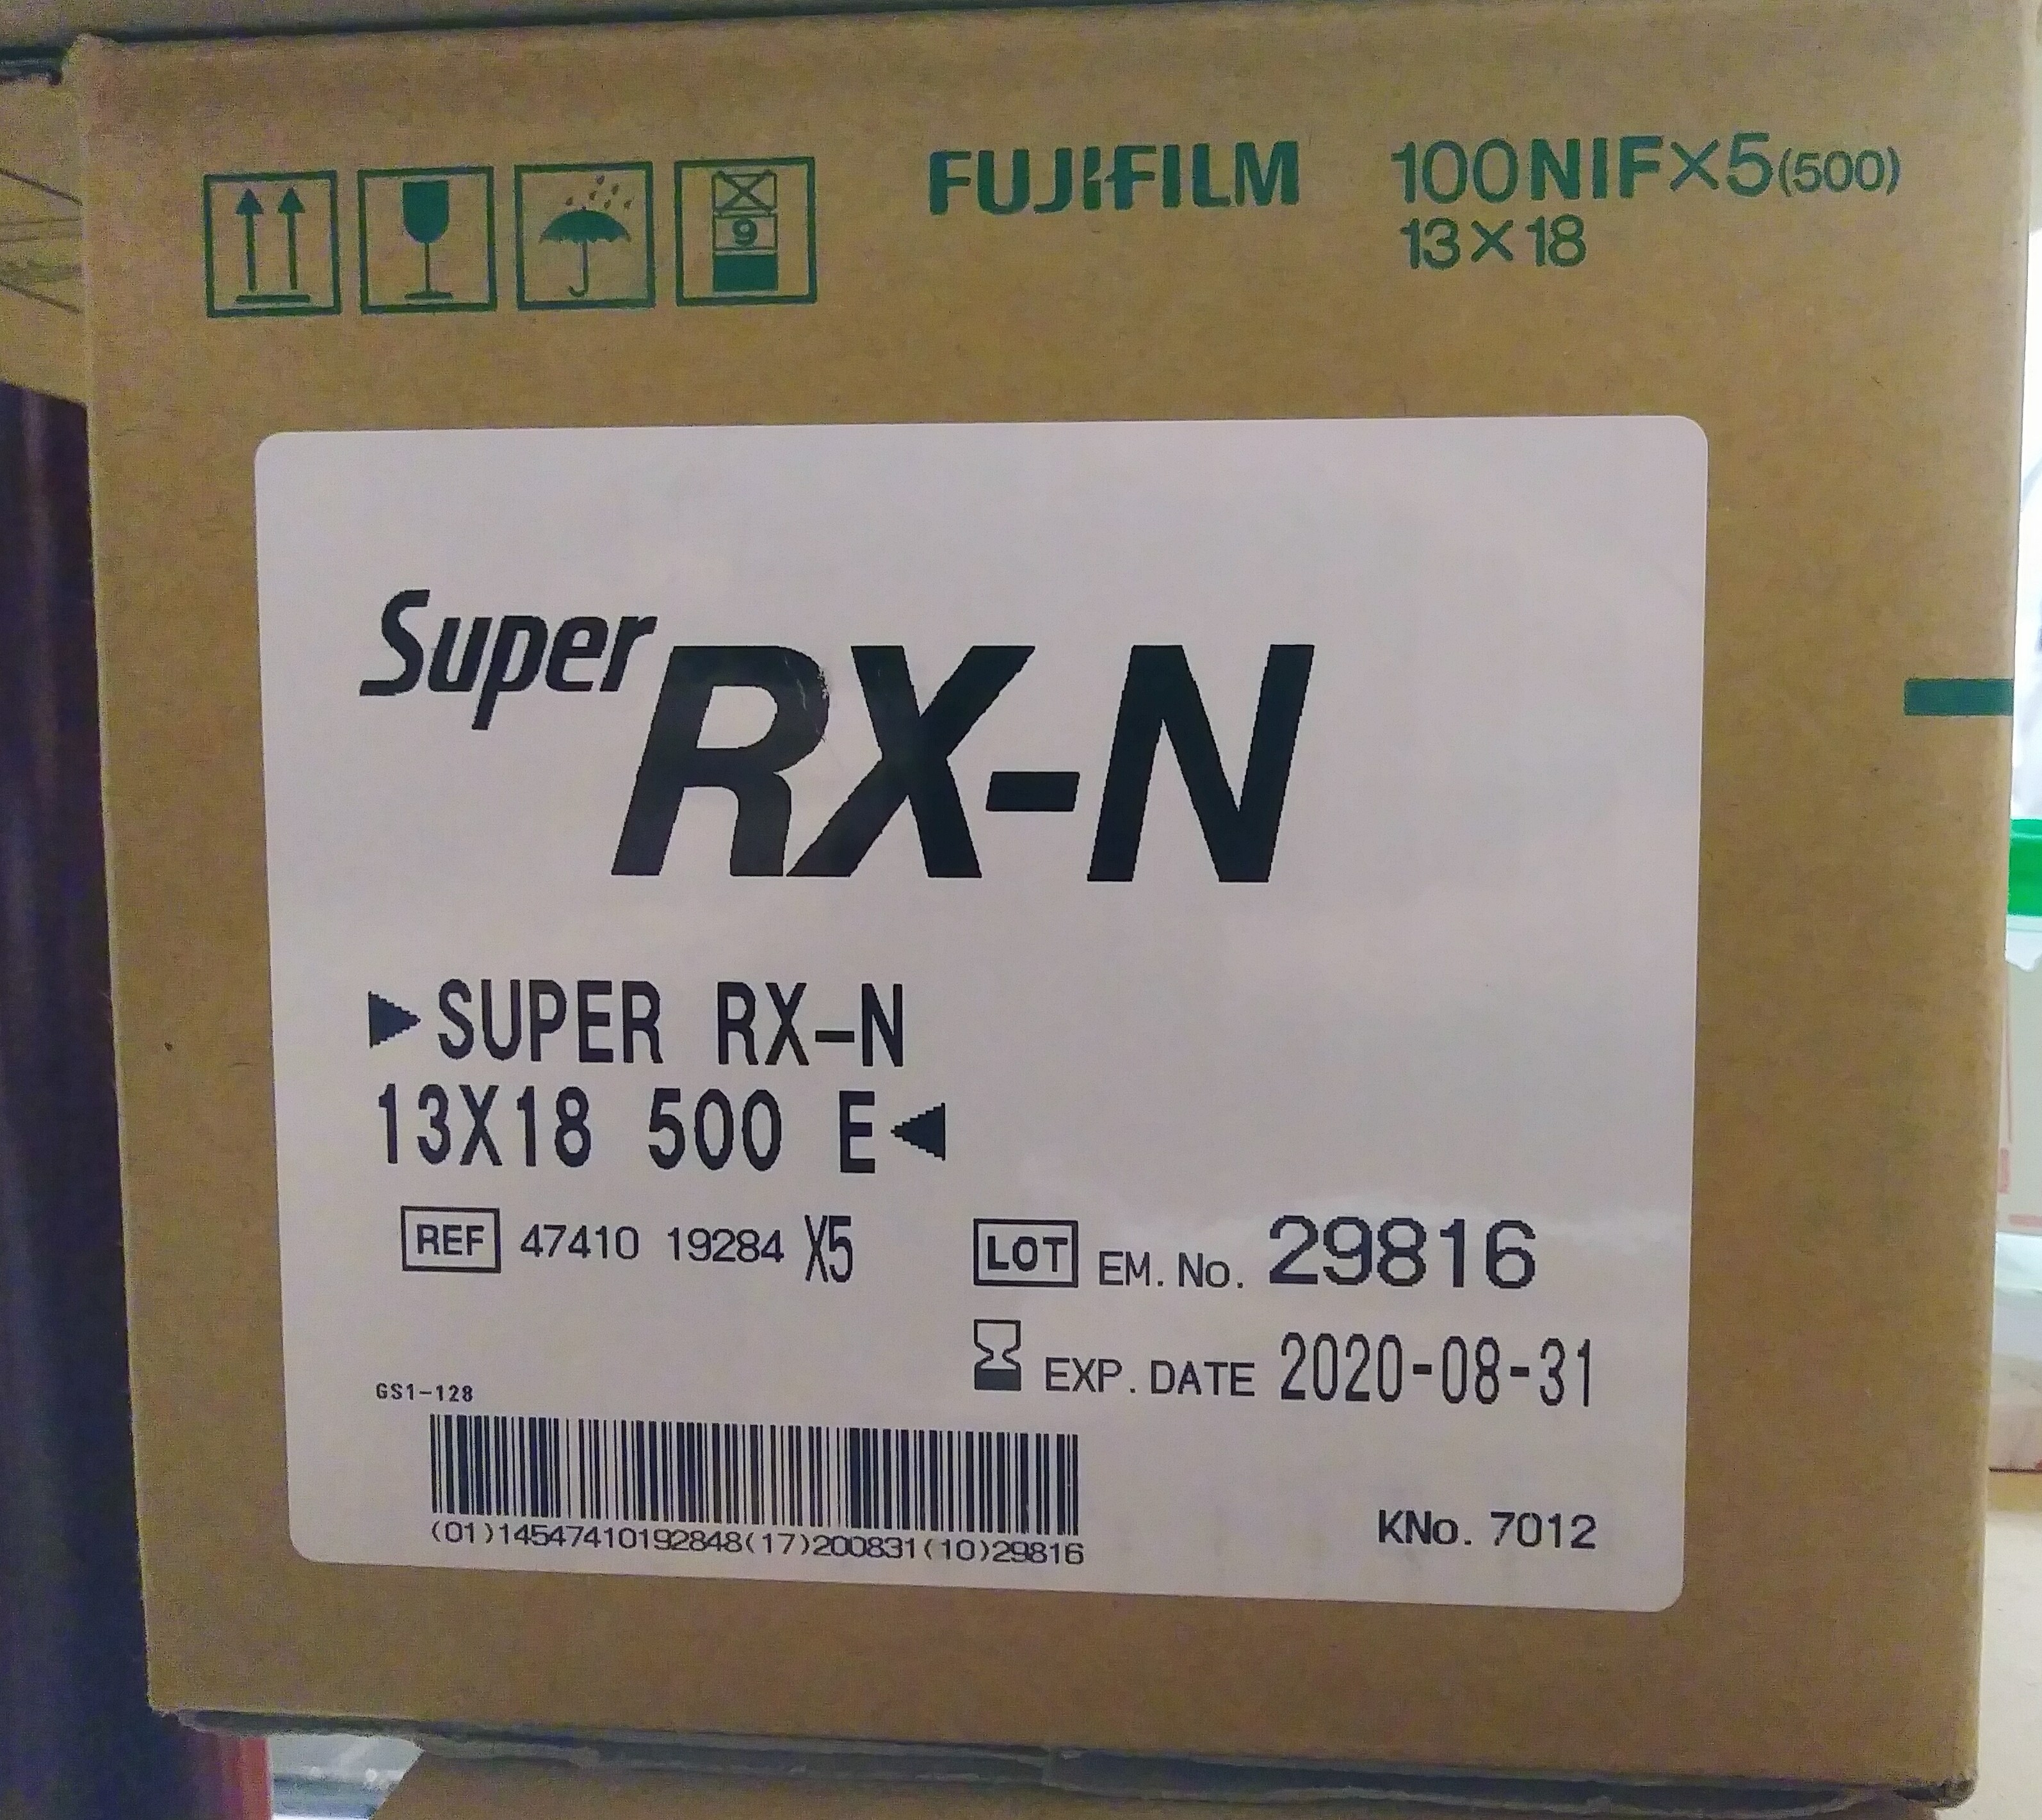
So here’s my camera. It’s a Kodak Vest Pocket Autographic and it takes No. A-127 film. I’m going to teach you to shoot cheap as hell x-ray film in it. See, digital x-rays are becoming a thing but most places that take them still use film, so they still make x-ray film and un-like a lot of stuff that’s intended for a professional setting x-ray film is way the hell cheaper than it’s public sector equivalent, cut film. If you can’t find a box of 100 sheets of 5×7 x-ray film online for $20.00 delivered, keep looking. Buy it. I lucked out couple years ago and ordered a box of 100 sheets but the folks in the warehouse messed up the order and sent me a case. The case has 5 boxes of 100 sheets and I’m only halfway through the first box. The rest is in a freezer.

So we got a camera, and some x-ray film. What else are we gonna need? A guillotine cutter, a changing bag (small is fine), a source of red light, and a closet or room you can make dark. Don’t worry you only need that room for a small part. Find a marker and some tape, electrical or other black tape is ideal but failing that you can get by with plain old masking tape and a scrap of tin foil. You’ll also need a developer of your choice HC-110 or Rodinal or Diafine, or Pyro, pretty much any film developer. You can’t go wrong with Diafine or HC-110. And something to do the developing in, trays or a daylight tank that’s big enough (what’s big enough? keep reading), or even just some ziplock bags.


Sacrifice a sheet of your x-film and take it out. Hold it up to the back end of your camera and mark out how big a piece it takes to not-quite-cover the rear of the camera. You want to mark it so that it’s not quite as tall as the cameras narrowest rear dimension and not so long as to hit any curves the camera might have on it’s longest dimension. For a 127 like my Autographic, 2 & 1/4 by 3 & 1/4 is a hair on the small side, but just fine. If you want, make it a bit more like 3 & 1/2 on the long side. Put the rest of the sheet aside for a moment and take off the back of the camera.

If you’re using one of the big folding Brownie’s then you can actually see the rear of the lens and the folded bellows, really the whole area that’ll frame your photo. Lay the sheet you cut down on there and make sure it’s big enough that it won’t fall inside or slide around but small enough the back will still fit over it. Cut the first piece down or use the remnant to make a bigger piece if you need. If you’re using a little 127 Autographic like me, turn the round cover on the back to expose the internals and slide the film inside to make sure it’s going to fit. If you’re camera has a B or T shutter setting you can use that now to see if the focus is accurate.

Take your tape and if it’s black and thick that’s enough, just tape all over the red window on the back of your camera. Tape all around the edges and anything else you think light might leak through. See all of these sorts of camera would normally use paper-backed film so they aren’t terribly light tight to begin with. If your using a thin or normal masking tape you can layer on some aluminium foil to get that light-proof capacity. By now you should know what we’re doing. Take your film template into a windowless closet with your guillotine and chop down some film.

Now go out and shoot. Yup, you’re gonna have to go into your changing bag with the camera everytime you shoot a frame, and that might actually be a good thing. You’ll spend more time considering if the shots worth taking if you gotta burn a couple minutes loading after every frame.

When it comes time to develop you need to pick a side of the film you care about and one you don’t. X-ray film has emulsion on both sides and it’s pretty fragile as far as emulsions go so chances are one is gonna get scratched up. My strategy for this is as follows. The Fuji x-ray film I bought has rounded corners. So when I cut down the 5×7 sheets I keep that rounded corner. Then I adopt the rule, when the rounded corner is in the top right, I’m looking at the emulsion. When I load it emulsion faces the lens, when I develop it (usually in PVC tubes in a daylight tank) the emulsion faces the developer.

The great thing about x-ray film is that it’s all orthochromatic, so you can always develop it under red light if that’s convenient. Try and do at least a few sheets in the developer of your choice to figure out how long to process for. Here’s my recommended jumping off points:

PMK pyro: 12minutes

Diafine: 3 minutes each A & B

HC-110: 6 minutes

When you’re all developed and fixed and washed and dry take a look at your negatives. If one side is really scratched up you might want to bleach off the scratched side of the emulsion. That’s wicked easy. Just tape down your negative on a plain white sheet of paper. Tape all four edges so that the good side of the emulsion is down and sealed off. Then grab a bottle of plain old laundry room bleach and a folded over sheet of paper towel. Lightly soak the towel, pressing it over the open lid of the bottle and doing a quick flip is my preferred method, you want it wet but not dripping, then wipe off the scratched emulsion. When that’s done give the paper a quick rinse under a faucet and then peel everything up so you can hang the now thinner but nicer looking sheets to dry.

If like me your first attempt shows a honking big light leak, go ahead and apply more tape.

A few more notes about shooting x-ray film:

This is strictly a sunny daylight film. You don’t want to shoot indoors and this isn’t going to get you very far if your under deep in shade in the woods. The ASA is going to be in the neighborhood of 25, which is actually a feature not a bug. The cameras we’re dealing with here are from a time when 25 or 50 was just about the fastest film going. Couple that with the age of the springs in your shutter and x-ray film is near perfect for these old cameras. There’s generally two sorts of x-ray film, green-sensitive and blue-sensitive. Blue-sensitive will get you more milage in the open on overcast days, and green-sensitive will get you more milage under cover on sunny days. Plan accordingly. Because it’s blind to red light you can pretty much use any red light you have handy as a safelight, a cell phone showing a full screen solid red image, a red bicycle tail-light, a string of red holiday lights, a night-light bulb with a coat of red paint, just about anything. Because it’s so-so-so-sunlight dependant you don’t need a perfectly black room for your darkroom. If you just can’t get the light to stop creeping in under the door, don’t worry, it’s not going to fog, not bad anyway. Note the sky in the positive above, it’s white. X-ray film is blue sensitive and the sky is blue so get ready to have blinding white skies if you choose to have them in your photos. You can’t knock it down with a red filter, because, you know, orthochromatic film. A yellow filter can help a little with the sky, and a green can help you with skin tones, but it’s generally a better bet to just not include any sky in you shots.

Anyway, my post on Arista Ortho-Litho 3.0 has been pretty popular so I figured why not one on the joys of Fuji Super RX-N X-Ray Film? Hope you liked it.

Developing 2¼ x 3¼ in Daylight Tanks

The best format in the whole of photography is 2¼ x 3¼. Call it 2×3, call it 6×8, call it mini, call it 9 frame 120. 2×3 is perfect. Why is it perfect? How could something that sells at just under $1 for a frame of the cheap stuff, or just over $1.50 for Ilford possibly be perfect?

No. 1: Don’t ever buy it as 2×3. Just don’t. Buy you rolls of 120. Buy you 4×5 or if it’s available 5×7 or even 8×10 and cut it down. A roll of 120 cuts down to 9 sheets easy. A 4×5 cuts down to 2 sheets. A 5×7 cuts down to 4 sheets. An 8×10? 9 sheets. Kodak Porta 160 for $1.6 a frame from 8×10, Kodak Ektar 100 at $0.60 a from 120. They don’t make much in 2×3? Cut it; everything medium format or larger cuts to 2×3.

No. 2: Format. Small enough to contact print wallet size, big enough for 8×10 enlargements without bad grain. That, and 2×3 doesn’t mean you need a 4×5 enlarger. Cheap out and throw it in a 35mm enlarger if you don’t mind a serious crop. Drop it into a 6×6 carrier and crop it square in the enlarger. Cut up a bit of card-stock and make your own 2×3 negative carrier; just about every diffusion enlarger and most condenser enlargers that can do 6×6 can stretch to 2×3 if you got the right lens. Store those negatives in a card binder, a playing card, a sport card, about the size of 2×3, no weird negative sleeves to buy.

No. 3: Process it in daylight tanks. That’s right, daylight tanks. No, not an overpriced Jobo Expert drum, not a dis-continued Combiplan, not a BTZS tube. Not some crazy rare cut film holder for a daylight tank either. You don’t need hangers, you don’t need a darkroom, or trays or anything exotic.

08-25-2018 1

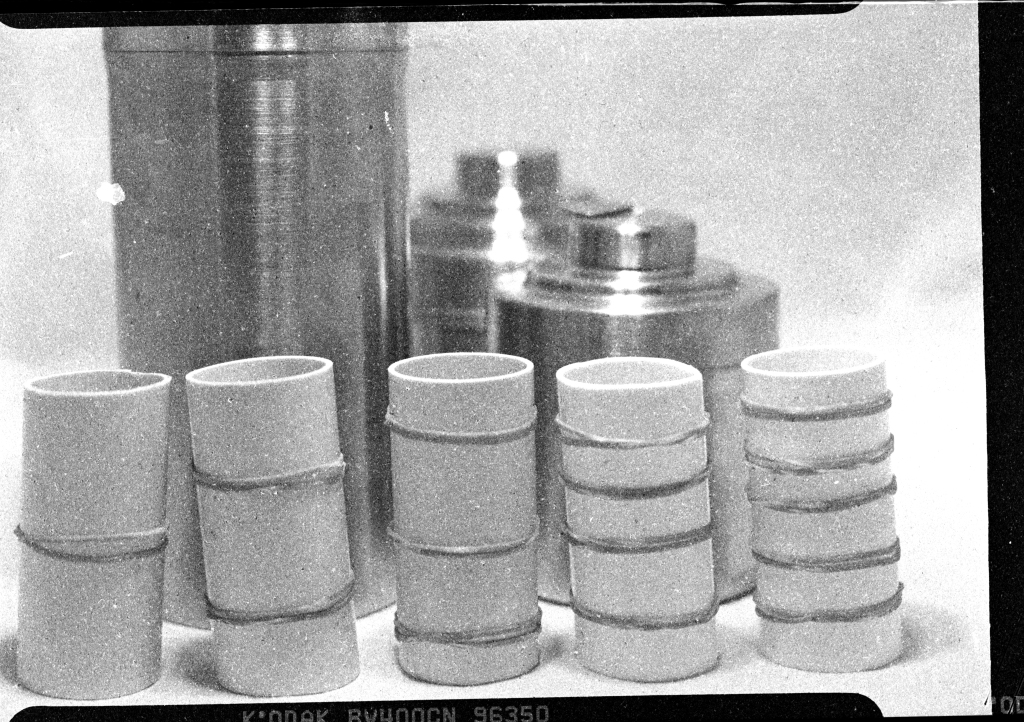
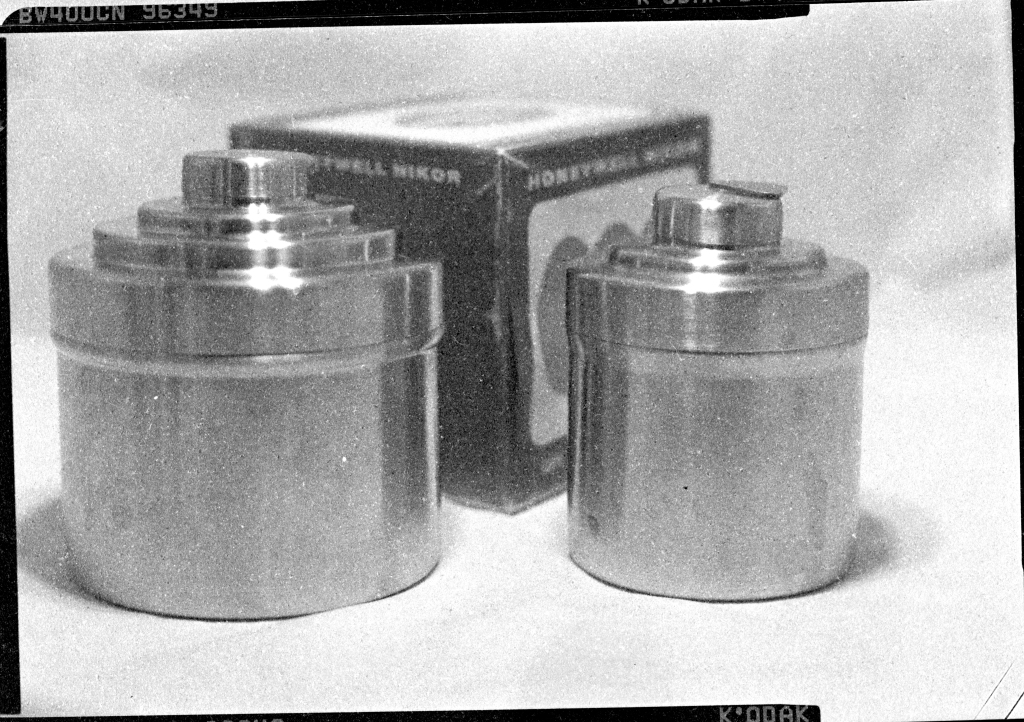
What you got to do is go out and grab $5 worth of 1½ or 1¼ OD PVC pipe at the hardware. Cut that into 3¼ lengths. Load that film into those tubes, curled, emulsion side in and drop them into your daylight tank in a dark bag. 3 to 6 frames fit in a 120 reel 500ml tank, 6 to 12 in a 1 liter tank. Picck up a Nikor extra film length tank, no one has the reels so those are cheap 800ml gets you 6 to 12 frames.

08-25-2018 6

When you pack it in the tanks remember that you can save a whole lot of trouble buy being smart with your pipe diameters. If you need to squeeze as many frames as you can into a tank, yeah use the 1¼. If you work with cut down sheet film, you might want to stick with 1½ only. Thin films cut down from rolls or real cheap sheets of lith or hard dot are fine in the narrow tubes. Thick slabs of old Kodak Panchromatic XX, not so much. If you’re in a 500ml tank mix and match to your little hearts content.

08-25-2018 5

Using a 1 liter tank, or a 2 liter monster? It’s better to stick with one size tube ’cause otherwise you’re asking for trouble. The narrow tubes can slip inside the wider and never mind the scratches that’s asking for under development. Slip some rubber bands around the tubes and they won’t slide around in the tank. They won’t shift enough to mention no mater how you agitate. Stack it right and with rubber bands you can use any mix you need.

That’s another thing, what you need. You need to fill the tank. Pack the tubes in there, vertical. Fill it even if you only need to do a couple sheets of C-41. Tubes that fall over, go on there sides, that’s problems; bad agitation and slow draining.


Arista Ortho Litho 3.0

Cheap film abounds boys and girls! It’s just not what you might think. Lithographic film isn’t for photography the way film film is. Lith film is photographically used for masking and copy work. If you want to create a mask so you can block out part of a negative that prints too dark you don’t have to cut out a mask with perfect precision–you just print it to lith and use the lith print as a mask. Or maybe you need to dupe some text, snap a shot either directly to lith film or print a negative of the shot to lith film and you’ll get a perfect transparency–clear film base and solid black text, no grey, no mud.

Mamiya Press cut 2
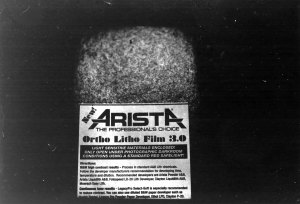
Arista Orto Litho 3.0 in Dektol 1:30 no agitation 2 minutes

That’s fine if you want to shoot a grey dog on snow and have a negative that’ll print a black dog on nothing–really. Here’s a black box of the stuff on a black background with it’s white label. With no agitation we get a little bit of a tonal range even though this would be a high-contrast frame on any film, let alone a film that is higher than high contrast. If you want a full tonal range you can use a specialty developer, or use a standard developer crazy dilute. Arista’s Ortho Litho 3.0 is orthochromatic in addition to being lithographic so you can processes it under red light (ortho films are blind to red) and develop to inspection in trays.

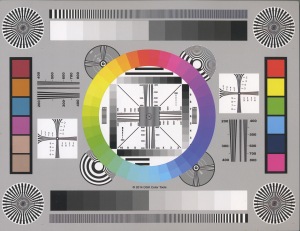
test target

So lets give a look to a frame of a boring sort of test target, full color low-res scan of the target above, and the same as a scanned negative made with Arista Ortho Litho 3.0 below.

Mamiya Press cut 4
Arista Ortho Litho 3.0 in Dektol 1:40 2 minutes

So besides the fact that I haven’t got the patience to bother with soft lighting we can still see a whole lot of contrast. We know stand development knocks down the contrast, and we know dilute developers are the best thing for stand. So if I knocked it down to maybe 1:50/1:60 and/or dropped it into the tray and left it for 4 minutes rather than swishing it about for 2 I might have got more grey separation on the dark side. As it is, there’s not a bad amount of tonal separation, if you consider this stuff was made to do white and black only.

There’s only so much one can do without getting a soft-acting developer, or making a other concessions to convenience. The problem is contrast, there’s plenty of silver density and the grains aren’t huge. Film developers are generally pretty slow, maybe 10 minutes as a basic developing time, so it’s going to take them a long time to get any density in the shadows–too long. By the time the shadows separate the highlights are going to be solid. So dilute it right? dilute it and we can do stand development and the developer around the highlight will get exhausted before they can act on all the silver and we’ll get some tonal range. Problem is, if you dilute a film developer too much you’ll end up making it so week it’ll exhaust around the shadows too, way before you’ve been able to get some range out of stand processing.

With Dektol, or any (very active, 1-2 minutes basic dev. time) paper developer, we can overcome the problem of exhausting the developer before the shadows have a chance to separate with a whole lot of dilution. It’s the same reason people like Bruce Barnbaum recommend using very dilute print developers and looooong slow dev. to inspection in the darkroom. Unlike the film developers because the paper has such a high level of activity it’s going to still work fast enough that the tones will separate before we run out of momentum, so the same strategy that gives Bruce amazing tonal range can turn a with film into a something more like normal film. Wicked contrasty normal film, but when you stop taking the pills your standards are sure to drop!


Mamiya Press cut 1

Did I mention 100 sheets of this in 4×5 (2 sheets of cut 2-1/4 x 3-1/4) or 5×7 (4 sheets of cut 2-1/4 x 3-1/4) is about $30.00? So $0.30 a sheet if you use it large format and $0.15 or $0.07 a frame if you cut it down depending on the base size. I’ll put up with all kinds of contrast for that price.

Neutral Density Filters

If you want to shoot with really long exposure, like maybe you want to make a photograph where the water flowing along in the little spillway up the road looks like flowing smoke instead of broken glass, or you want to make people disappear, you’ll need either a really slow film, a really small aperture, or a filter.

The above options work because you need a longer exposure to get the right exposure on the film, so that’s the story. Long exposure times make fleeting presences go away and moving things blur.

Slow film requires a long exposure, particularly in low light. A small aperture will do the same, require a longer exposure time, but maybe your camera only stops down to f-32. If it’s sunny out and you’ve loaded up some 100 ISO film you might still need to use a shutter speed of 1/500th.

What ND Filters Do

An ND filter will drop the quantity of light that gets to the film in a given period of time, good ones do it without any tint or image degradation–they absorb full spectrum light. Any filter is basically lowering the speed of the film you have in your camera. For color filters they’re slowing down only light of their own color, effectively raising the speed on the opposite wavelength.

You can use your ND filter to make your 100 ISO film work like it’s 50 ISO, 25 ISO, 12.5 ISO, 6.25 ISO or even less! They work across the board, they’re color neutral. ND filters are sold with different descriptions of their power, ND2, 1 Stop, Filter Factor 2, 2X, .5%, 1/2, or .3 are some examples, and those all mean the same thing. Like all things camera, they change in halves up or down the line, that is things move in stops. So if an ND1 lets by all of some quantity of light, an ND2 lets by one full stop less. That’s half the light that an ND1 does, and an ND4 lets by two full stops less or one quarter the light an ND1.

That means using an ND2 filter let’s you double the length of time your shutters open. If you needed 1/60th with no filter you’ll need 1/30th with an ND2 and 1/15th with an ND4. If you want to think about that in terms of film speed an ND2 turns your 400 ISO film into 200 ISO film and ND4 turn’s that 400 ISO film into 100 ISO. Thinking about it in terms of f-stop means you’ll get the same exposure time (but the resulting depth of field characteristics) using no filter and f-16 as you’ll get with an ND2 filter and f-8. So you could shoot wide open on a sunny day and get a nice soft background if you have a heavy enough ND filter in front of the lens.

Stacking Filters

There’s a big range of ND filters out there, from very minor ones that knock out a third of a stop (or even less) to ones that are almost opaque and cut ten stops or more. No one needs to buy every ND filter, you can get by with a few and just stack those to drop more stops of light as needed. Stacking works the way you’d think, an ND2 which takes one stop stacked with an ND8 which drops light by three stops, all together blocks four stops.

So how that works with math is 2×8=16. 16/2=8, 8/2=4, 4/2=2, 2/2=1. We had to divide by two four times to get to unity, so an ND2 stacked with an ND8 cuts the light by four whole stops. A 2x4x8 stack gives you sixty four which takes six steps of division by two to get to unity–so would cut the light by six stops. Don’t go thinking an ND2 with an ND4 equals an ND6, now you know better.

If you’re going to do any stacking always put your lightest ND filter farthest from the lens and the darkest closest. Darker filters have to block more light, heat up more, and as a result will degrade faster if they’re not great quality. Even if they’re top of the line that heat stress can do some damage so just believe it, alright? I also suspect that particularly with darker filters they’re less truly neutral in density.

What’s Your Exposure?

You got some 100 ISO film loaded up and you’ve stopped your aperture way down to f-32. You’re exposure meter gives you a shutter speed of 1/60th. Drop in an ND2 filter and you can now shoot at half that, 1/30th. Drop in another filter, maybe the next one from your set, ND4, and you can now shoot two stops slower than that, 1/8th. Drop in the next filter from your set so you now have three all in a line, ND2-ND4-ND8 and you get four more stops of exposure time for a 2 second exposure. Easy peasy.

Considering a Project

There is at present in my camera, in my Diana F+ fitted out with the 135 film back and the panoramic-with-sprocket-holes mask a found roll on 400 ISO AgfaColor. It came to me as so much does, in a box of vaguely remembered origin. It’s two thirds spent now, guessing it was not previously exposed or fogged. Being unsure of the state of the film I was little concerned when I lost a frame here or there as it tumbled about in bags and desk drawers; fire a frame once and again; fire a frame of the ground.

I like the ground. I don’t have to worry what I might see, not on the ground. That could be why making photos of the ground started for me. I propose it should continue because it’s interesting. Landscapes look up and out, scenic overlooks, vistas. Dull. I’m closer to the ground. I think about the ground. I look at the ground. I touch it, feel it, hear it. It supports me and one day, protesting and unwilling, I’ll disappear entirely within it.

I propose to make pictures of the ground.

For the project not any camera will do, not any lens. Something that focuses close, real close. A lot of lenses can focus down to a meter, that’s not close enough. A meter’s far enough that there’ll be the temptation to put the camera up, to look through it. Looking through a viewfinder is never good for anyone.

So use a wide angle lens, put a close up lens on it. The Diana F+ has a 55mm that focuses at 17cm with the close up supplemental lens in place. That’s a bit close but it’s better than most other options. That’s the lens then. For the first roll, I think a square format, but not 120 film, the 135 film back then, and the square mask, that’ll do more frames on a roll and that’s good seeing as the ground changes so often.

Yes, when I finish this roll the project will begin. Square frames, of the ground, from a hands distance. Until then I re-read The Secret-Life of Dust last night when I couldn’t sleep and I’ve just started The Ground Beneath Us.